Showing posts with label Wacky Wednesday How-to. Show all posts

Wednesday, July 17, 2013

How to Make a Crochet Button


This crochet button is from the Perfect Purse Pattern on LionBrand.com (You will need to register to see the FREE pattern). I thought this would be a cool project to share with you. You could make it in any color to match any handmade or re-purposed clothing.

Materials: (from the Perfect Purse Pattern)

  • Crochet Hook size G
  • Lion Brand® Cotton-Ease® (or any basic acrylic yarn of your choosing and color)

Abbreviations:

  • ch = chain
  • Rnd = Round
  • sc = single crochet
  • sl st = slip stitch
  • st = stitch
  • sc2tog = single crochet 2 together

HOW TO MAKE A CROCHET BUTTON

  • Ch 2.
  • Rnd 1: Work 3 sc in first ch, join with sl st in first st to form a ring.
  • Rnd 2: Ch 1, work 2 sc in each st around; join with sl st in first st.
  • Rnd 3: Ch 1 *sc in next st, 2 sc in next st; rep from * around, join with sl st in first sc.
  • Rnd 4: Ch 1 *sc in next st, sc2tog; rep from * around, join with sl st in first st.
  • Fasten off.
  • Cut yarn, leaving a long tail. Thread tail into large-eyed blunt needle, sew around edge of Button, pull tightly to gather, fasten off. Use remaining tail to sew Button to Purse.

You can also try taking a clear button and crocheting around it with embroidery thread or fingering thread (yarn weight 0, 1, or 2) like this pattern for crochet beads. That way you could use it for heavier items like jackets and sweaters. I might write a pattern for these type of crochet buttons in the future.

Grab my button!


I linked this blog entry to:
This Silly Girl's Life Manic Mondays at Serendipity and Spice Sumo's Sweet Stuff

Thursday, April 18, 2013

Recycled Yarns: Part 3 - How to make yarn out of JEANS

Don't forget to check out the other two How-to's:
Part 1: How to make yarn out of plastic bags
Part 2: How to make yarn out of t-shirts

I know this post is a day late. I was trying to figure out when I can plan this tutorial. I ended up doing this Wednesday night right before I want to bed. It was still done on Wednesday, though!

Here is the third part of my recycled yarn tutorial: How to make yarn out of jeans.

1) First, you will need a old pair of jeans. You can use any type of jean material, from original jean to stretch jeans. It will make a difference on how you cut the jean.

2) Cut a leg off the jeans. Get as close as you can so you can get as much yarn as possible.


3) Cut the bottom hem of the jean leg.

 4) Now you will be using the same instructions from the t-shirt yarn. Depending on the material, you would need to cut about 1 inch strips. The jeans I used were stretchy. I tried cutting 1/2 inch strips, and some of the strips broke when I finished. I used the rotary cutter to cut the strips, then I cut through the smaller seam to continue the loop strips.


5) Flip your jeans to the other side seam, and you want to cut diagonally to make one continuous strip of jean.

6) You then CARFULLY roll up the jean into a ball.

This is what happens when I pulled too tight on the jean yarn. The smaller seams of the thinner parts of the yarn ripped. The smaller seam was not as strong as I thought. But I can still use these strip pieces for another craft, or just crochet the pieces in. I will have to figure something out.

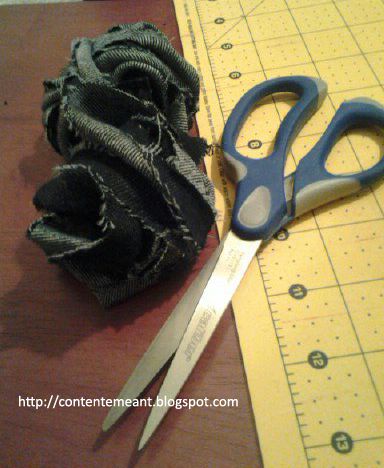
These also look like they could be nice jean roses.


I hope you enjoyed my 3-part tutorial. There may be a part 4 when I figure out how to spin newspaper into yarn...


Grab my button!

Wednesday, April 10, 2013

Recycled Yarns: Part 2 - How to make yarn out of T-SHIRTS

Don't forget to read Recycled Yarns: Part 1 - How to make PLARN and Part 3 - How to make yarn out of JEANS

Welcome to Part 2 of my 3 part series! Today I will show you have to make yarn out of t-shirts.

(I want to apologize in advance about the picture quality. I did part of this in the morning and finished at night. There was not enough light in some pictures.)

1) First, find an extra large shirt. The larger the shirt, the more yarn you can make (I found XXXL shirts from the thrift store).

2) Cut the top half of the shirt, from armpit to armpit.

3) Cut the hem off the bottom of the shirt.

You will now have a large rectangular piece of fabric.

4) Fold the rectangle in half, lengthwise.

5) Fold the fabric again, lengthwise.

6) When you fold the shirt, make sure you have an inch of shirt extra, This part of the shirt will not be cut. You don't see the extra inch in this picture, but you will see it in the next couple.

7) Start cutting 1 inch sections from top to bottom, making sure that inch of extra shirt doesn't get cut. I think this is easier to do with sharp scissors. I had a difficult time cutting the amount of shirt with the rotary cutter.

 I cut about 13 pieces of 1-inch strips.

This is how it looks like opened up.

8) Put the shirt on your arm, so that the 1-inch strip is visible.
You'll need to cut diagonally as shown in the picture below, so that you will have a continuous strip of t-shirt.

9) Roll the shirt into a ball, making sure you stretch the strip. 1-inch cuts will make rather thick t-shirt yarn. Next time I will try to cut a little smaller that 1-inch cuts. If you make them too small, the yarn will rip.

And there you have it! Yarn made out of t-shirt.


Grab my button!

Wednesday, April 3, 2013

Recycled Yarns: Part 1 - How to make PLARN (yarn out of plastic bags)

Part 2: How to Make Yarn out of T-SHIRTS
Part 3: How to Make Yarn out of JEANS

Welcome to Wacky Wednesday's How-To! Part 1 of "Recycled Yarn". Today I will teach you how to make plarn, which is yarn made from plastic bags. You can use scissors to cut the bags, but I prefer a cutting mat and a rotary cutting tool. It makes cutting a breeze!


1) Take any plastic bag from a grocery store. Make sure it is clean. 
Fold it down by pulling the bottom corners of the bag.


 2) Fold the bag in half.

3) Fold it again.

4) Fold a third time.


5) Cut the bottom of the bag and the handles off.


You will then have a piece of plastic bag about 13 inches long.

6) Cut the plastic in strips about 1 inch thick.

I cut about 13 pieces.


7) Open the sections and you will see that they are circles.

8) Now you can take one section and loop it into another section.


Pull one loop into the other.

Loop one into itself.

Pull the bags as tight as you can without breaking them. I found this is a better method than just tying the pieces together. You won't have to struggle with big knots in your projects.

9) Loop the 13 pieces together and roll it up like yarn.


Tada! Plarn! One bag down...99 more to go to make my market bag...


Grab my button!

Printfriendly

Related Posts Plugin for WordPress, Blogger...