Showing posts with label recycle. Show all posts

Wednesday, April 22, 2020

Earth Day 2020 - Loving the Planet

Happy Earth Day! I'm glad I didn't get to miss the day this year because this year is its 50th anniversary. In this interesting time of our lives, I always think about how different the world is right now. One of the bright sides of this pandemic is that there is less smog in the air. The air quality is improving. Residents can see buildings and mountains because of the increased air quality.
Source from The Washington Post 
I found this article from The Washington Post, and they show a map of the United States and a map of Europe. It shows a comparison of air quality from the beginning of 2019 verses what it is currently. I'm amazed that in a matter of months, the air quality has greatly improved. 

What else can we do for the planet? Along with recycling items, it is best to figure out ways to reuse recyclable and non-recyclable products. If you want to try your hand at gardening and growing your own produce, try reusing everyday containers. I created a seed growing pod with a wet mop cloth container and toilet paper tubes. You fold the bottom into itself, fill them up with soil and start planting.
 Once the plant is situated, you can transport the whole paper roll to a larger container or directly in the ground. The paper roll is biodegradable!
The new seeding is a snap pea plant! 


Are you a crafty person that wants to reduce waste? Yesterday I watched the Yarn Thing Podcast with Marly Bird on Youtube. She reminded me about Earth Day! She gave a great talk about recycled yarns and reusing plastics bags to make plarn. Go check out the video below, and subscribe to Marly Bird's channel!


I also wrote a few blog posts about plarn and recycling t-shirts and jeans back in the day. Still good posts to remind me how to make plarn!


One final link! Sign up for TerraCycle.com to research their recycling programs and how to recycle various items that we are not sure how to recycle. You can order zero waste boxes and learn more about eliminating single-use products. They even have a section for DIY upcycling projects!

What are you doing for Earth Day?

Wednesday, May 20, 2015

Decluttering and reorganizing myself for the future

When I was younger and my parents would tell me to clean my room, I would say, "I wouldn't be this messy if I had my own home". I always thought I would have a minimal lifestyle. When I go to the store and I find something I like, I either say "I can make that" or "I can't buy this now because it won't fit in my room".

Then my boyfriend started looking at minimal home living, small homes, traveler homes and storage container homes, like the one above from James&Mau in Chile. *drool* One of the many amazing dream homes we could eventually build one day.

Now he is looking to buy a home. And it made me realize, one day I will have my own home to fill. What will I do then? I'd love to buy all the pillows and colorful patterns and figure out my own style. And once a family comes along, there will be more things to organize and declutter.

I first started hearing about the capsule wardrobe from Un-Fancy, a blog I stumbled on reading articles on Facebook. There are so many times I can think of when I purchase something I kinda liked, or I bought something my friends said looked good on me. But when I got home, I saw the outfit in a different light. Some clothes didn't fit the right way, or I would buy something thinking I would modify it and make something else out of it (I'm still holding onto a lot of old high school t-shirts to make something one day).

When I used to work at Starbucks, I had a section in my closet of black pants and polo shirts to choose from every day. I had a couple of khaki pants, but I couldn't wear too many white shirts because drinks would tend to spill on me. After leaving that job, I started collecting more colors. Now working at an office job, I have combined my wardrobes to include black pants and a bright colored shirt. And I could buy all the bright colored shirts I've ever wanted, but will I be wearing them more than once? This is why having a minimal set of clothes is a better way to go. I tend to go to my favorite clothing for work everyday anyways.

I have kept a lot of things I don't need or things that don't fit me. Every week, I have been taking a section of my closet or drawers and removed most of the old things like socks, old t-shirts, skirts I never wore, shirts that have shrunk, etc. I have kept most of these things because I think I will fit in them again someday. The older I get, the further Someday becomes. I'm working out, and I like the shape I'm in. I've already given away those old pair of jeans from high school, but there is still more I can part with.

There has also been a lot of changes in my parent's life, and they may be retiring and moving back to Chile. Who knows how long we all have left to live in the comfort of my parent's house. We've been living in the same house for almost 30 years, and we've seen demolitions and reconstructions over the years. But one day soon we will all move away. The thought of carrying so much junk I don't need made me decide to start giving things a new home.


I saw this video on tidying up your home, and I had to share it. I've been working on cleaning my room in a different way, not only finding a place for certain things, but wondering if I really need the item. It has changed my thinking to wonder if what I have makes me happy. I try to purchase items that I will use for a long time, but sometimes there are books or art supplies that sit on my bookshelf for years. Let's not talk about the two large containers of yarn hiding in my closet! I want to make sure I make something from it or I will give it away to someone else.


yayspring-373

I remember my favorite outfit in high school was a shirt and jeans. It was plain but comfortable and clean. Too bad jeans aren't allowed in work, because I would wear them all day. But once I find a comfortable pair of slacks, I want to wear them all the time. Maybe I can get back to the simple basic wardrobe, but now I can add statement pieces and other colorful accessories. 

Saturday, January 10, 2015

Make a jewelry organizer: recycling an old photo frame

My first DIY project of the year! I have always wanted to make my own jewelry holder out of a picture frame, but I could never find the right size.

I went to my local thrift store around christmastime, and I found a large 14x20 frame. The glass was removed, and that's what I wanted.

I couldn't figure out what to put as the insert. I have seen metal screens and lace used, but I didn't want to buy something new. So I found an old knit shirt that I was saving. I have tried to unravel it to save the yarn, but because it was machine knit, there was no way.

So I cut the sleeves off, and it was a perfect fit for the frame.


 If I didn't have the backing, I would have stapled the knit onto the frame. But I used the backing and stretched the knit in between. I might staple it later on, but the backing has some metal findings that hold the pieces together.


I had finally made what I always wanted. It was perfect for all of my earrings. I was also thinking of adding metal hooks to hang my necklaces. I'll make an update when I complete it.


Until next time,
Sara

Friday, November 1, 2013

Trunk or Treat: The Wizard of Oz

Did you ever get a store bought costume that was missing something? I tend to plan costumes at the last minute. My boyfriend bought this costume from the movie Oz the Great and Powerful:

(source)
The hat was not as nice as the hat shown, and pants were not included. The costume fit him well, but there was one problem. He has a beard, so he looked more like Abraham Lincoln (not the Vampire Hunter). I did a few modifications on the suit and it changed the outfit.


I sewed green cloth to make a fake green vest. I even added four buttons and a functional pocket. With the hat, I added green ribbon and added some cardboard inside to make it sturdy.


The best part is the monocle. He made it out of a green color camera filter and copper wire. We clipped a  fake gold chain to make the outfit complete. 

And check out his car for the trunk or treat! He took milk jugs and placed them on the trunk as teeth! He used a felt blanket for the tongue.


Don't forget Dorothy! What a fun time for the kids!

(source)

I linked this blog post to:
Lovely Ladies Linky 

Thursday, August 15, 2013

How-to Make T-Shirt Covered Notebooks


I have SO MANY t-shirts collected over the years from thrift stores and events I went to. I got tired of the mound of shirts in my room, besides I was never going to wear most of them (unless I made something out of them). I made this neat T-Shirt Covered Notebook over the weekend.

This idea is perfect for a tween or teen that has too many shirts! Sometimes we have shirts that have sentimental value to us (like my high school senior shirt). Why not recreate it into something usable (like I plan to make the high school shirt into a pillow,  but that's for another entry).

Also check out this tutorial on I Love to Create's Blog.


I found this old composition book in my book shelf collection. I think I used it in middle school. I love the look of composition notebooks, but this one needed new life.


I cut the front design from an extra large shirt in the shape of the notebook...


Then I spread some Elmer's glue on both sides and wrapped the shirt around the notebook.


I reused a plastic card to spread the glue evenly.


Bye bye old cover. It was so cool back then to color in the white spaces!


As you can see here, the glue started to bleed through the shirt. But I assume it will dry clear.


I was thinking to glue the edgings to inside of the notebook, but I was having trouble cutting the shirt straight. So I just trimmed the edges with fabric scissors.


Cool shirt design, right? Props to friends at Symphonic Distribution and Lorenzo Cantera Designs.


I let the notebook chill in my bookshelf to dry flat for a few days.


I linked this blog entry to:
The DIY'ers

Tuesday, April 23, 2013

Elmer's Naturals Pin to Win Sweepstakes!

To celebrate Earth Day, Elmer's is doing their own Pin & Win on Facebook!


  1. FILL OUT the form on Elmer's Facebook Page.
  2. FOLLOW Elmer's on Pinterest.
  3. CREATE a board called "Naturals Pin & Win with Elmers" and REPIN at least one pin from each category:


Thursday, April 18, 2013

Recycled Yarns: Part 3 - How to make yarn out of JEANS

Don't forget to check out the other two How-to's:
Part 1: How to make yarn out of plastic bags
Part 2: How to make yarn out of t-shirts

I know this post is a day late. I was trying to figure out when I can plan this tutorial. I ended up doing this Wednesday night right before I want to bed. It was still done on Wednesday, though!

Here is the third part of my recycled yarn tutorial: How to make yarn out of jeans.

1) First, you will need a old pair of jeans. You can use any type of jean material, from original jean to stretch jeans. It will make a difference on how you cut the jean.

2) Cut a leg off the jeans. Get as close as you can so you can get as much yarn as possible.


3) Cut the bottom hem of the jean leg.

 4) Now you will be using the same instructions from the t-shirt yarn. Depending on the material, you would need to cut about 1 inch strips. The jeans I used were stretchy. I tried cutting 1/2 inch strips, and some of the strips broke when I finished. I used the rotary cutter to cut the strips, then I cut through the smaller seam to continue the loop strips.


5) Flip your jeans to the other side seam, and you want to cut diagonally to make one continuous strip of jean.

6) You then CARFULLY roll up the jean into a ball.

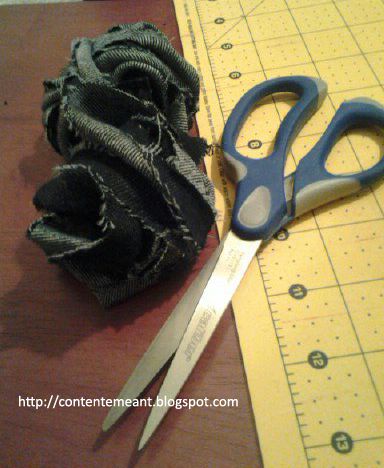
This is what happens when I pulled too tight on the jean yarn. The smaller seams of the thinner parts of the yarn ripped. The smaller seam was not as strong as I thought. But I can still use these strip pieces for another craft, or just crochet the pieces in. I will have to figure something out.

These also look like they could be nice jean roses.


I hope you enjoyed my 3-part tutorial. There may be a part 4 when I figure out how to spin newspaper into yarn...


Grab my button!

Printfriendly

Related Posts Plugin for WordPress, Blogger...