Showing posts with label crafts. Show all posts

Sunday, May 4, 2014

"May the 4th be with you..."

I have married friends that are star wars fanatics. She even wanted her son born today, May 4th. She did not go into labor though, but he should be born in a couple of weeks.

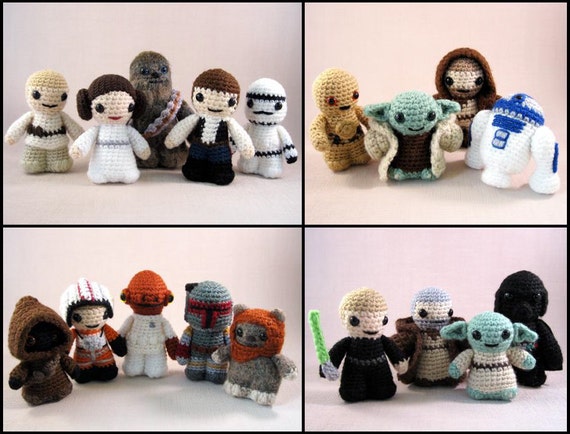
I was looking around the internet last week, and I found these adorable star wars amigurumi sets. These are so cute! I haven't tried arigurumi yet, but if I did I don't think I would stop making these cute things!


PDFs of Set 1 of Star Wars Mini Amigurumi Patterns - includes 14 crochet patterns
Lucy Ravenscar Crochet (Etsy)
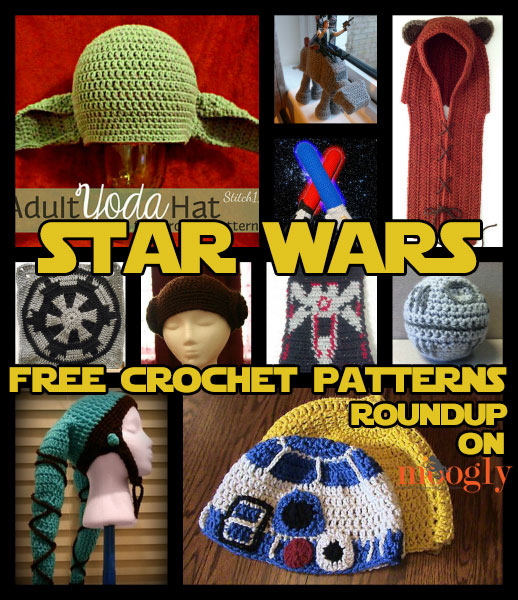
I also found these free star wars patterns on Moogly.com. I already have the ewok hood pattern waiting to make.

Too bad they're not having a girl, because I know they'd love to do a photo shoot like this: 

Monday, May 13, 2013

Puzzle Frames for Mother's Day

What a long and wonderful weekend! I had the pleasure of playing music all weekend and seeing my nephew. He spent the weekend at my parent's house.

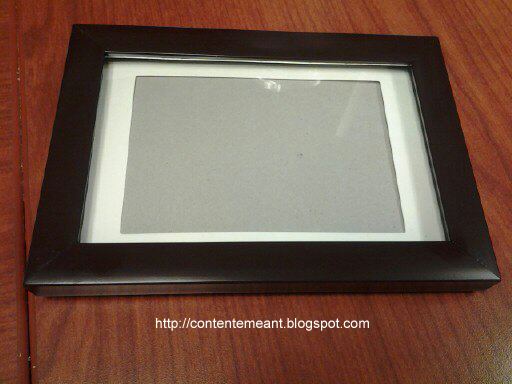
For mother's day I wanted to make my mom something special and simple. I went to the dollar tree for inspiration and came back with this idea of a puzzle picture frame.


I bought plastic frames and a puzzle from the dollar tree. I also bought paint, but when I saw this puzzle of colorful gum drops, I decided not to paint them.


I glued the puzzles to the frame with a simple glue stick. I was thinking of hot gluing the pieces, but I didn't have the glue gun handy. I'm happy that the glue stick held the puzzle pieces.


I bought two frames to make one for my mother and one for my nephew's grandmother, who adopted him after his mother passed away a couple of years ago.

Thank you for reading! What did you do for mother's day?

Sara


I linked this blog post to:
Thirty Handmade Days Today's Creative Blog  stringtown

Thursday, April 18, 2013

Recycled Yarns: Part 3 - How to make yarn out of JEANS

Don't forget to check out the other two How-to's:
Part 1: How to make yarn out of plastic bags
Part 2: How to make yarn out of t-shirts

I know this post is a day late. I was trying to figure out when I can plan this tutorial. I ended up doing this Wednesday night right before I want to bed. It was still done on Wednesday, though!

Here is the third part of my recycled yarn tutorial: How to make yarn out of jeans.

1) First, you will need a old pair of jeans. You can use any type of jean material, from original jean to stretch jeans. It will make a difference on how you cut the jean.

2) Cut a leg off the jeans. Get as close as you can so you can get as much yarn as possible.


3) Cut the bottom hem of the jean leg.

 4) Now you will be using the same instructions from the t-shirt yarn. Depending on the material, you would need to cut about 1 inch strips. The jeans I used were stretchy. I tried cutting 1/2 inch strips, and some of the strips broke when I finished. I used the rotary cutter to cut the strips, then I cut through the smaller seam to continue the loop strips.


5) Flip your jeans to the other side seam, and you want to cut diagonally to make one continuous strip of jean.

6) You then CARFULLY roll up the jean into a ball.

This is what happens when I pulled too tight on the jean yarn. The smaller seams of the thinner parts of the yarn ripped. The smaller seam was not as strong as I thought. But I can still use these strip pieces for another craft, or just crochet the pieces in. I will have to figure something out.

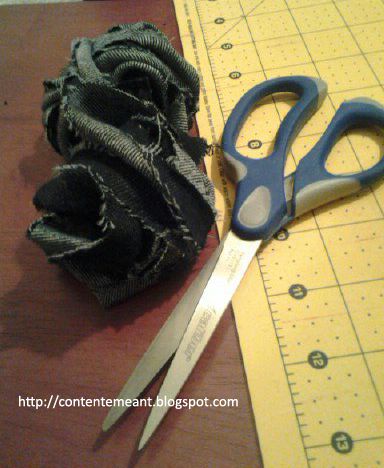
These also look like they could be nice jean roses.


I hope you enjoyed my 3-part tutorial. There may be a part 4 when I figure out how to spin newspaper into yarn...


Grab my button!

Wednesday, April 10, 2013

Recycled Yarns: Part 2 - How to make yarn out of T-SHIRTS

Don't forget to read Recycled Yarns: Part 1 - How to make PLARN and Part 3 - How to make yarn out of JEANS

Welcome to Part 2 of my 3 part series! Today I will show you have to make yarn out of t-shirts.

(I want to apologize in advance about the picture quality. I did part of this in the morning and finished at night. There was not enough light in some pictures.)

1) First, find an extra large shirt. The larger the shirt, the more yarn you can make (I found XXXL shirts from the thrift store).

2) Cut the top half of the shirt, from armpit to armpit.

3) Cut the hem off the bottom of the shirt.

You will now have a large rectangular piece of fabric.

4) Fold the rectangle in half, lengthwise.

5) Fold the fabric again, lengthwise.

6) When you fold the shirt, make sure you have an inch of shirt extra, This part of the shirt will not be cut. You don't see the extra inch in this picture, but you will see it in the next couple.

7) Start cutting 1 inch sections from top to bottom, making sure that inch of extra shirt doesn't get cut. I think this is easier to do with sharp scissors. I had a difficult time cutting the amount of shirt with the rotary cutter.

 I cut about 13 pieces of 1-inch strips.

This is how it looks like opened up.

8) Put the shirt on your arm, so that the 1-inch strip is visible.
You'll need to cut diagonally as shown in the picture below, so that you will have a continuous strip of t-shirt.

9) Roll the shirt into a ball, making sure you stretch the strip. 1-inch cuts will make rather thick t-shirt yarn. Next time I will try to cut a little smaller that 1-inch cuts. If you make them too small, the yarn will rip.

And there you have it! Yarn made out of t-shirt.


Grab my button!

Tuesday, April 9, 2013

Recycling Toilet Paper Rolls

What to do with all these toilet paper rolls? 
I've been seeing many posts in blogs and pinterest on reusing toilet paper rolls, and I had to share!

 I saw this picture on All Free Knitting's Facebook page on  reusing a toilet paper roll and holder as a yarn holder. What a great way to store yarns of any amount.
AllFreeKnitting.com

I am planning on doing this next project when I get enough rolls. Burlap and Denim shows a tutorial on how to made seed starters out of toilet paper rolls.
burlapanddenim.com

I love this idea of a Toilet Paper Roll Bird Feeder. A fun craft to do with kids too!
jugglingwithkids.com

I saw this idea pinned, and I thought it was very logical. Make a marker caddy by putting toilet paper rolls in a shoe box, and you can store pencils, pens and markers. I love pens and markers, so this project is perfect for me!
auntpeaches.com

They are also a good place to store all those cords with a Cord Storage Box.
apartmenttherapy.com


Or for the super crafty, you could go all out and make these awesome Faux Metal Wall Art from SuzysSitcom.com. She also has 3 other tutorials: Faux Metal Filigree Frame, Faux Brass Wall Clock, and Faux Iron Gate! Amazing! 4 Great Projects from Recycled Toilet Paper Tubes!

4 Great Projects from Recycled Toilet Paper Tubes!


Monday, April 1, 2013

Easter Games, Crafts and Recipes

I am reposting this entry because the last couple of ideas did not post!

My church is having an "Eggstravaganza" Easter event today, and I get to help with the crafts! I had a lot of fun helping the kids last year. I thought a list of new games and crafts would be a good idea for this year. Here are some different games and craft ideas that I found.


GAMES:

Picture: The Taste Tester
1) Memory Game - from MarthaStewart.com
Play a matching game that tests who has the best memory. Make matching pairs of colored eggs, dyeing on side only. You could also take plastic eggs and change only the bottom colors. Set eggs face down in an egg carton. The first player tries to find a match by turning over two eggs. If they match, he keeps them and goes again. If not, he turns them face down, and the next player is up. Kids keep taking turns until all the matches are found. Whoever finds the most matches wins the game. Plus, you could put little gifts inside the plastic eggs for more fun, like this next game.


2) Find the Coin - From Little Family Fun
Place a penny (or better yet, a golden dollar) in a plastic egg. Place other little treats in the other plastic eggs, so that they all have something in them. If you have a big group of kids, let them choose one egg and see what's inside. You go around the group until someone finds the coin. You can even place a golden ticket in one, so whoever gets the ticket wins the grand prize. You can also put Bible verses inside to make the game more story interactive, like these Resurrection Eggs from Sofia's Primary Ideas and TeachKidsTheBible.com. Or, you can try this next fun game.


3) Left Right Easter Game - from Diva Girl Parties and Stuff
Give every child a gift (or a plastic egg with goodies). Explain to the kids that they will have to pay close attention to the story, because while someone is reading the story of Jesus, the kids will have to listen for the reader to say LEFT or RIGHT. Whenever they say LEFT or RIGHT, the kids will pass their gifts in that direction. At the end of the story, they can open whatever gift they have in their hands. This game is good for any party or holiday. You can follow the story from Diva Girl, or you can write your own.

CRAFTS:

4) The biggest hit in our Easter event last year were these Magic Color Scratch Crowns from Oriental Trading. Kids of all ages enjoyed scratching different words and designs to make their crown personal. 


5) Secret Message Necklace Egg Craft - from Parent Teach Play
Another one of the crafts we've done at my church's egg hunt are bracelets and necklaces the kids can decorate themselves. I love how focused some children get when they are making things that they can proudly wear. I love this necklace idea from Parent Teach Play. You can use any color string or yarn, and the kids can add whatever color beads and trickets. Then just add a plastic egg with a message inside and you have a wonderful craft any kid would cherish.


Recipes:

6) Resurrection cookies - from Beneath My Heart
I never heard about these cookies until this year. I love the idea that you can share the story of Jesus' death and resurrection while using everyday ingredients to give your children a better understanding of the story.


Printfriendly

Related Posts Plugin for WordPress, Blogger...